[See Previous Page] [See Previous Page]
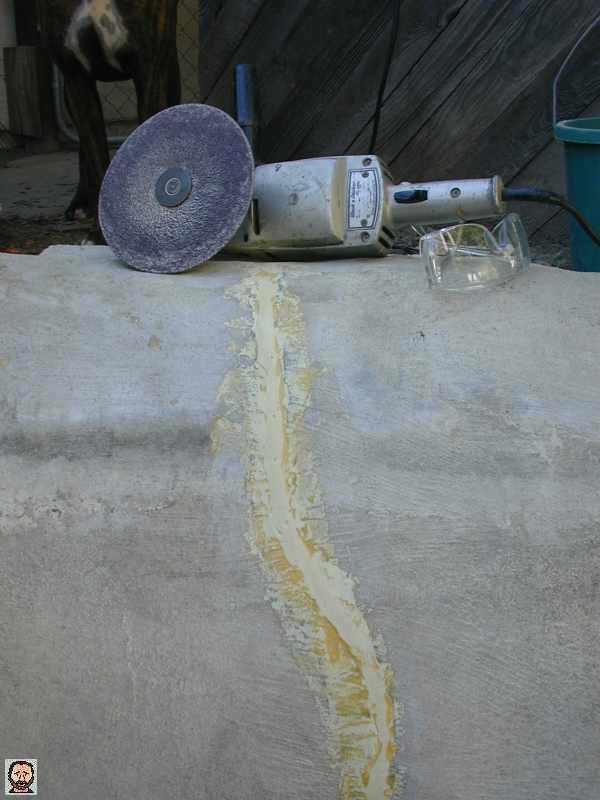
The first thing I did was to "grind" the
previous RayCrete patch with a disk sander.
I was surprised to find that the sanded RayCrete looked better.
I guess the sanding removed the glossy surface sheen.
To color the RayCrete, I used Jack's suggestion to use
some pastel chalk and sandpaper to make some filings. I could not find any black chalk, so I ended up purchasing
some inexpensive colored chalk. The colored chalk contain a concrete gray colored chalk that I used to color
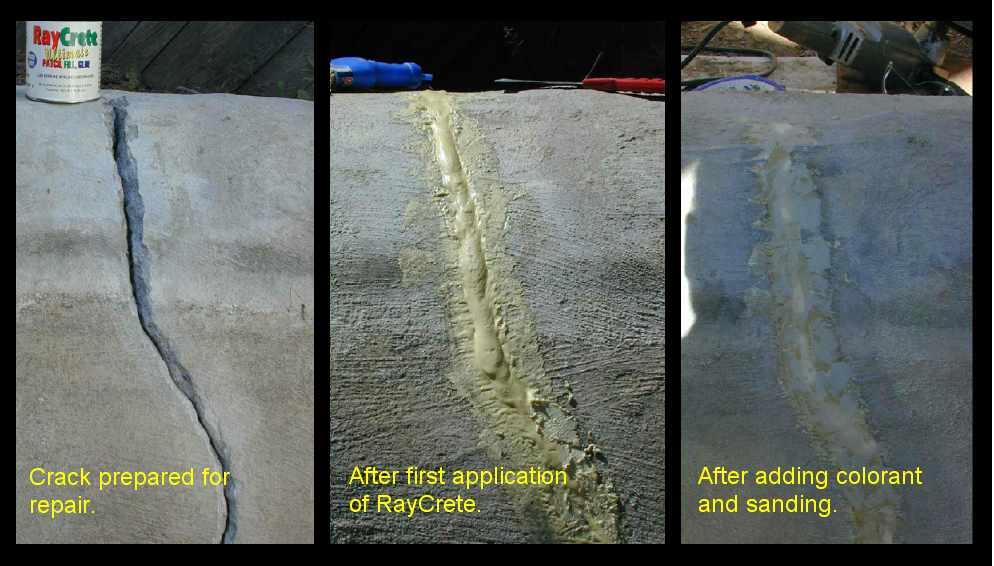
the RayCrete Part A. It took two attempts with more gray chalk filings before I got the color about right.
It was not easy applying a thin layer over the previously
repaired area because of the product's consistency and short curing time. The colored layer had a shiny sheen
like the uncolored patch.
The colored patched layer looked better after sanding.
As I said before, in a couple months, a carpet of dark algae will cover the patch.
UPDATE: After time, the chalk-colored RayCrete patch faded back to the original color.
Coloring the RayCrete with chalk was a waste of time, but sanding the RayCrete improved the look.
UPDATE 2013: My patched concrete pond (built in 1981) is still holding water with no leaks! Although RayCrete
is no longer available, I have found a similar product called Pond Shield. Google search; "how to fix a leaky fountain" and "40 year old cracked pond repair".
Copyright © 2001-2013 by Koi.Net
Koi.Net created by Richard L. Renshaw
This page last updated January 28, 2013
|