![]() About 18 months ago I noticed a crack in a concrete
Koi pond I had built in 1981. Although this pond had survived the
Northridge earthquake of 1994, it had now developed a crack next to where a large “Umbrella
tree” (Schefflera actinophylla)
was growing. Update: I now believe that the Northridge earthquake started the crack. I decided to put off repairing the crack until I had some time off
during the summer of 2000. Because of some unforeseen surgery and recovery, the
project got put off another year. I did have a chance to remove the Umbrella
tree, but by then the crack had “grown” and it was now much more
noticeable that the pond was losing water. With the tree stump gone, I
reinforced the concrete edge of the pond where the crack started with more reinforced
concrete and waited until the summer of 2001.
About 18 months ago I noticed a crack in a concrete
Koi pond I had built in 1981. Although this pond had survived the
Northridge earthquake of 1994, it had now developed a crack next to where a large “Umbrella
tree” (Schefflera actinophylla)
was growing. Update: I now believe that the Northridge earthquake started the crack. I decided to put off repairing the crack until I had some time off
during the summer of 2000. Because of some unforeseen surgery and recovery, the
project got put off another year. I did have a chance to remove the Umbrella
tree, but by then the crack had “grown” and it was now much more
noticeable that the pond was losing water. With the tree stump gone, I
reinforced the concrete edge of the pond where the crack started with more reinforced
concrete and waited until the summer of 2001.
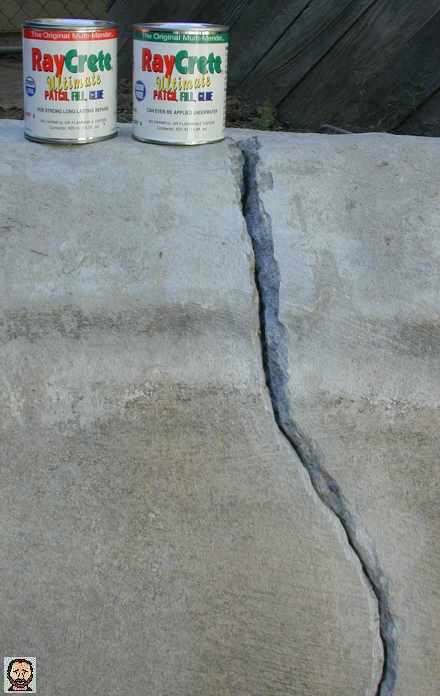
![]() As summer approached, I disconnected the pond
filtering system and added some
Simazine (Aquazine 80) to kill all the algae
growing on the sides of the pond. Then in June I emptied the pond of water. I
already knew by then that the crack was worst than originally expected.
Although the crack appeared to go completely across and up the other side,
after the pond was empty, I could see that the crack did not run all the way
across the bottom of the pond.
As summer approached, I disconnected the pond
filtering system and added some
Simazine (Aquazine 80) to kill all the algae
growing on the sides of the pond. Then in June I emptied the pond of water. I
already knew by then that the crack was worst than originally expected.
Although the crack appeared to go completely across and up the other side,
after the pond was empty, I could see that the crack did not run all the way
across the bottom of the pond.
![]() My plan for repairing the crack was to
“chisel” the crack to open it up. Then to use concrete adhesive and
some concrete crack repair product to patch the crack. I did not have total
confidence that a new crack would not develop along the edge of the repair. I
was even considering a costlier backup plan that would involve hiring some
laborers to remove the old pond and dig a deeper hole to accept a
W. Lim prefab pond.
My plan for repairing the crack was to
“chisel” the crack to open it up. Then to use concrete adhesive and
some concrete crack repair product to patch the crack. I did not have total
confidence that a new crack would not develop along the edge of the repair. I
was even considering a costlier backup plan that would involve hiring some
laborers to remove the old pond and dig a deeper hole to accept a
W. Lim prefab pond.
![]() I was searching the web for articles on repairing
cracked concrete ponds when I stumbled across an article by Valiant Technologies on repairing a crack in a pond.
After reading the article, I decided to give the product a try. Although the
article talks about fixing a crack under water, I figured it should be better on a dry
exposed surface.
I was searching the web for articles on repairing
cracked concrete ponds when I stumbled across an article by Valiant Technologies on repairing a crack in a pond.
After reading the article, I decided to give the product a try. Although the
article talks about fixing a crack under water, I figured it should be better on a dry
exposed surface.
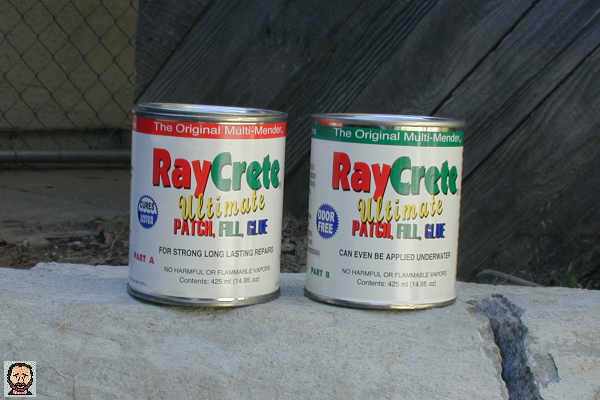
![]() Valiant Technologies Inc. advertises RayCrete as the
“Ultimate patch, fill, glue for strong long lasting repairs (can even be
applied underwater).” RayCrete comes in two cans and appears to be a
“epoxy” like product. Valiant says it is “polymer
based” and RayCrete is different from normal epoxy in that it is odorless,
nonflammable, and can be cleaned up (before cured) with “lemon
juice” (although I used acetone).
Valiant Technologies Inc. advertises RayCrete as the
“Ultimate patch, fill, glue for strong long lasting repairs (can even be
applied underwater).” RayCrete comes in two cans and appears to be a
“epoxy” like product. Valiant says it is “polymer
based” and RayCrete is different from normal epoxy in that it is odorless,
nonflammable, and can be cleaned up (before cured) with “lemon
juice” (although I used acetone).
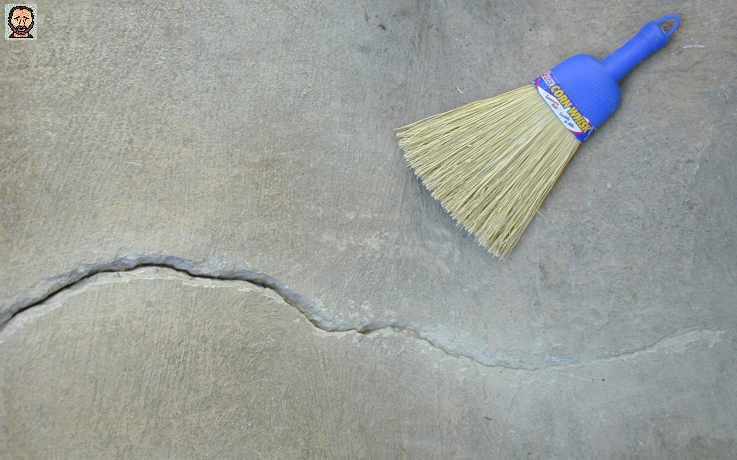
![]() Repairing the crack was easy because of the
preparation I did. I took the time to clean the cracked area and obtain various
putty knives, small trowels, mixing tools, etc. Because of the short 20 minutes
curing time, I applied the RayCrete in two sessions. The product
“covered” more area than I expected and waste was minimal. The
first application pretty much did the trick. The next day the second
application allowed me to go back and cover some areas I missed.
Repairing the crack was easy because of the
preparation I did. I took the time to clean the cracked area and obtain various
putty knives, small trowels, mixing tools, etc. Because of the short 20 minutes
curing time, I applied the RayCrete in two sessions. The product
“covered” more area than I expected and waste was minimal. The
first application pretty much did the trick. The next day the second
application allowed me to go back and cover some areas I missed.
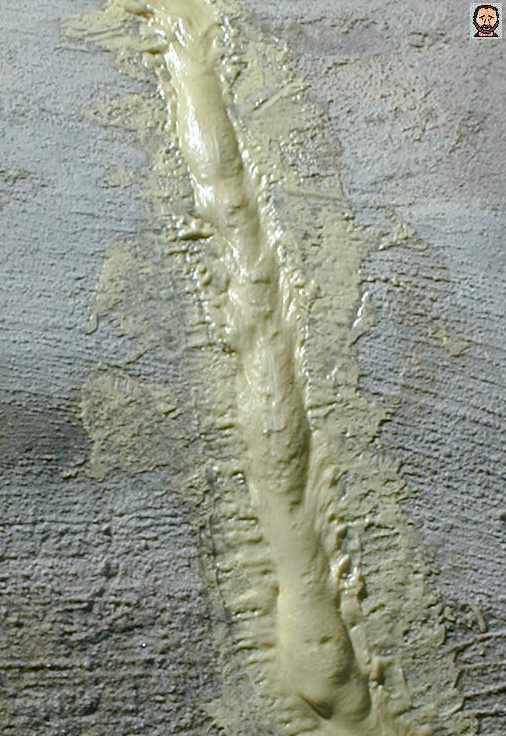
![]() When applying RayCrete it has the consistency of
epoxy or “bondo.” After the RayCrete adhesive/filler has had a
chance to set up it appears like it may remain a little flexible. But by the
next day it was as hard as a rock. I was very confident that it would hold up and not
leak.
When applying RayCrete it has the consistency of
epoxy or “bondo.” After the RayCrete adhesive/filler has had a
chance to set up it appears like it may remain a little flexible. But by the
next day it was as hard as a rock. I was very confident that it would hold up and not
leak.
![]() Although RayCrete may appear to be a little expensive;
$29.95. for 420 ml kit (BTW: I ordered the 850 ml kit), I have no regrets
considering what my other options were. I feel the RayCrete did a better job
than any of the more readily available concrete patch products at big box stores. My one advice
to the manufacture would be to try and make RayCrete available in a more cement
gray color. The appearence of the repaired crack does not bother me. I know in time a
carpet of dark algae will again cover the sides of the pond.
Although RayCrete may appear to be a little expensive;
$29.95. for 420 ml kit (BTW: I ordered the 850 ml kit), I have no regrets
considering what my other options were. I feel the RayCrete did a better job
than any of the more readily available concrete patch products at big box stores. My one advice
to the manufacture would be to try and make RayCrete available in a more cement
gray color. The appearence of the repaired crack does not bother me. I know in time a
carpet of dark algae will again cover the sides of the pond.
[Update from the manufacture]
![]() "The color of concrete can be duplicated with some black or gray powered colorant (concrete power
color or just use some pastel chalk and some sandpaper to make some filings)."
"The color of concrete can be duplicated with some black or gray powered colorant (concrete power
color or just use some pastel chalk and some sandpaper to make some filings)."
![]() "The best technique for coloring is to pour your dry powder colorant into the light weight material
(Part A) and mix it until it becomes about the color you want, then when you mix an equal share of
the Part B with your colored Part A you will have colored RayCrete. It is a good idea to experiment
with the colors before you use it on a big job, but when you are confident that your Part A is the
color you want then mix enough colored Part A to do the full job. Mix small portions of the colored
Part A with an equal portion of Part B and apply it in small areas. Because you have a consistent
Part A color you can be sure that each small batch you make will have the same color when mixed
together with the Part B."
"The best technique for coloring is to pour your dry powder colorant into the light weight material
(Part A) and mix it until it becomes about the color you want, then when you mix an equal share of
the Part B with your colored Part A you will have colored RayCrete. It is a good idea to experiment
with the colors before you use it on a big job, but when you are confident that your Part A is the
color you want then mix enough colored Part A to do the full job. Mix small portions of the colored
Part A with an equal portion of Part B and apply it in small areas. Because you have a consistent
Part A color you can be sure that each small batch you make will have the same color when mixed
together with the Part B."
![]() "RayCrete is sandable and that you can sand down the surface of the RayCrete repair area. Then with
some colorized RayCrete you can make a thin layer application over the previous repair area and make
the repair disappear."
"RayCrete is sandable and that you can sand down the surface of the RayCrete repair area. Then with
some colorized RayCrete you can make a thin layer application over the previous repair area and make
the repair disappear."
![]() "Remember that the timeline to take advantage of RayCrete's most liquid state is only within the
first five minutes, so if you want to use it in this state, mix small quantities so you can cover
the area within this short period of time."
"Remember that the timeline to take advantage of RayCrete's most liquid state is only within the
first five minutes, so if you want to use it in this state, mix small quantities so you can cover
the area within this short period of time."
Jack Mattson
Valiant Technologies Inc.
[More information on How to Repair a Crack in a Concrete Pond pt. 2]
 on Valiant Technologies: Apparently RayCrete is no longer availabe and Valiant Technologies is no longer in business.

Click on the Pictures below to Enlarge